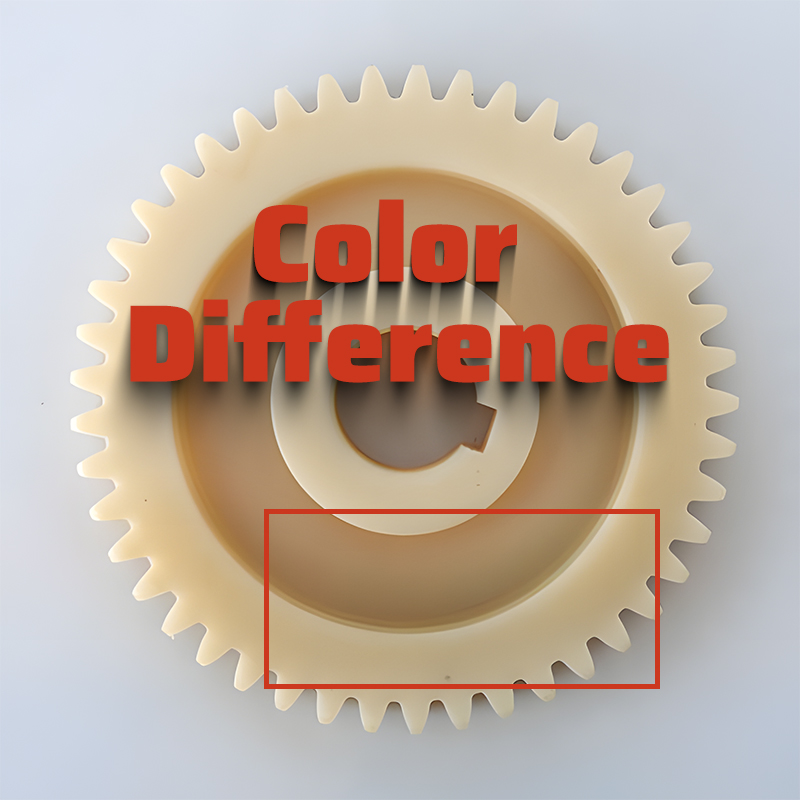
Color consistency has become an important characteristic to consider in injection molding production. However, uneven color or color difference issues continue to trouble many injection molding factories. This common injection molding defect can be caused by a variety of reasons.
This article will comprehensively introduce the causes of color differences and the solutions. If you are interested in other injection molding defects, please click the link below to learn more.
| Understand Different Injection Molding Defects | ||||
|---|---|---|---|---|
| Flash | Short Shot | Sink Mark | Warpage/Deformation | Burn Mark |
| Splay Mark/Silver Streak | Dark Spot/Black Speck | Flow Mark | Bubble | Weld Line |
| Color Difference/Uneven Color | Ejector Pin Mark | |||
What is uneven color or color difference in injection molding?
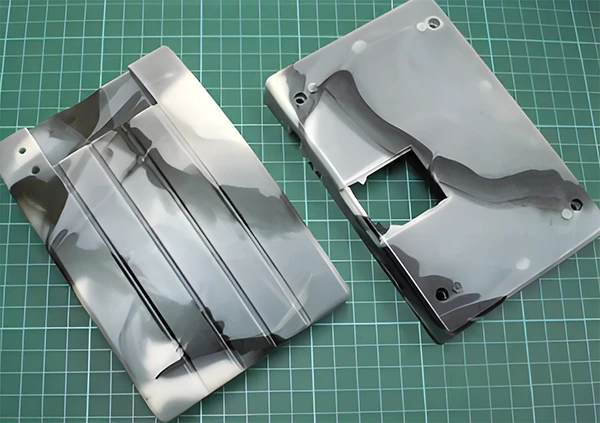
Uneven color refers to the unevenness in the color of the surface of injection molded parts, characterized by variations in depth and hue, including mixed colors, and discoloration. This common defect in injection molding can lead to significant scrap rates for batches of molded parts due to differences in color between components.
Detection and judgment of color difference in injection molding
Visual inspection:
1. For the determination of product color variation, the inspector must not have vision impairments (such as color blindness or color weakness). Otherwise, a colorimeter must be used to determine the acceptability of the color difference.
2. Generally, color differences within 0.50 (relative to the color board) are difficult to detect by the human eye. However, when the color difference between two parts deviates from the color board by 0.5, one being yellowish and the other whitish. The color difference becomes noticeable, especially when producing matching parts where control is crucial.
3. Uneven color measured by colorimeters may differ significantly from what the human eye perceives. Machine-measured color differences can exceed visually acceptable levels. In such cases, the general control principle involves comparing with a sample. If the color difference is not noticeable and the parts can be matched, then proceed with production. If matching isn’t feasible or the color difference surpasses standards and is visibly noticeable, the parts are deemed non-conforming. Alternatively, corrective actions are recommended.
4. Lighting or the surrounding environment greatly affects color observation. It is generally not advisable to judge color differences at the production machine. This is because of the significant impact of the machine’s lighting.
Colorimeter inspection:
To strictly control the appearance quality of products, a colorimeter can be used. The determination by a colorimeter mainly focuses on the △E value corresponding to the range of color difference:
| △E represents the total color difference | |
|---|---|
| △E Range | Color Difference (Tolerance) |
| △E*0~0.25 | Very small or none; Ideal match |
| △E*0.25~0.5 | Minor; Acceptable match |
| △E*0.5~1.0 | Minor to moderate; Acceptable in some applications |
| △E*1.0~2.0 | Moderate; Acceptable in specific applications |
| △E*2.0~4.0 | Significant; Acceptable in specific applications |
| Above △E*4.0 | Very large; Unacceptable in most applications |
What is the international standard range for color differences?
Color differences include variations in brightness and hue. Traditional methods of evaluating color differences rely on direct visual observation. The bad result is it can vary due to observational conditions and human color perception capabilities. To facilitate the measurement of color differences, systems based on the International Commission on Illumination (CIE) standards, standard light sources, and the spectral trichromatic excitation system have been developed and refined. This method quantifies visual color discrimination using the tristimulus values XYZ. Users can measure the color difference between a standard and a sample using a colorimeter, which displays:
△E total color difference △E = [(△L)^2 + (△a)^2 + (△b)^2]^(1/2)
△L = L_sample – L_standard (brightness difference)
△a = a_sample – a_standard (red/green difference)
△b = b_sample – b_standard (yellow/blue difference)
△L+ indicates a shift toward white, △and L- indicates a shift toward black
△a+ indicates a shift towards red, △a- indicates a shift towards green
△b+ indicates a shift towards yellow, △b- indicates a shift towards blue
Different industries have varying requirements for acceptable ranges of color variation. However, there is currently no international standard for color difference ranges. These are typically negotiated between manufacturers and customers.
Normal color variation tolerance ranges:
| △E Range | Color Difference Description |
|---|---|
| 0 – 0.25△E | Very small or none, ideal match |
| 0.25 – 0.5△E | Minor, acceptable match |
| 0.5 – 1.0△E | Minor to moderate, acceptable in some applications |
| 1.0 – 2.0△E | Moderate, acceptable in specific applications |
| 2.0 – 4.0△E | Significant, acceptable in specific applications |
| Above 4.0△E | Very large, unacceptable in most applications |
Causes of uneven color/color difference in molded parts
1. Material Factor
(1) High content of volatiles in raw materials, contamination with foreign materials, or poor drying can affect the processing performance of materials.
(2) Uneven distribution of fiber fillers in molded materials can lead to fiber exposure on the surface. This affects the appearance of the molded parts.
(3) Poor crystallization properties of the resin can affect the transparency of molded parts, leading to uneven surface coloration.
(4) High-impact polystyrene and ABS materials may develop stress discoloration due to internal stresses after molding.
(5) Test the thermal stability of raw material resins; for materials with poor thermal stability, consider replacing them.
(6) Strengthen the inspection of raw materials upon receipt to ensure they meet performance requirements.
2. Quality control of colorants (color powders, masterbatches) Factors
(1) The performance of colorants directly affects the color quality of molded parts. If the dispersibility, thermal stability, and particle morphology of the colorant do not meet process requirements, it is impossible to produce parts with good color.
(2) Some colorants in flake form can form directional arrangements when mixed into the melt during molding, causing uneven coloration on the surface of molded parts.
(3) When colorants are dry mixed with raw materials and adhere to the surface of the material particles, they may not disperse well after entering the barrel, leading to uneven coloration.
(4) If colorants or additives have poor thermal stability, they can easily decompose when heated in the barrel, leading to discoloration of molded parts.
(5) Colorants can easily become airborne and settle in the hopper and other parts of the injection molding machine, contaminating the machine and mold and causing uneven coloration on the surface of molded parts. If the injection molding equipment and molds are contaminated by colorants, thorough cleaning of the hopper, barrel, and mold cavity is required.
(6) When selecting colorants, they should be screened based on process conditions and color requirements of the molded parts, especially important indicators such as heat resistance and dispersibility, which must meet process requirements.
(7) Most injection molding factories do not produce plastic masterbatches or color masterbatches themselves; control of plastic masterbatches or color masterbatches in production management and raw material inspection should be strengthened.
(8) Before masterbatches enter the factory and before batch production, spot color testing should be performed, comparing both with the customer-provided color board and with masterbatches used in previous and current batches.
Use Masterbatch Machines To Add Color Masterbatches
Many companies now use color masterbatch machines to add color masterbatches, which has greatly aided in controlling color differences. When using a color masterbatch machine, the following is important to note:
a) Determine the amount of masterbatch to be added through experiments, then adjust the screw speed of the color masterbatch machine to match the plasticizing time, ensuring that the addition of the masterbatch is completed by the end of the plasticizing time.
b) When using a color masterbatch machine, note that the outlet of the machine is small and may become inaccurate in dispensing material particles after a period of use, or even cause production shutdowns. Therefore, we should clean the screw of the color masterbatch machine regularly.
3. Equipment Factors
(1) During production, color variations can occur due to damage to a heating ring or loss of control in the heating control section, causing severe temperature fluctuations in the barrel and resulting in color differences due to poor plasticization or material decomposition. Methods for determining color differences caused by these factors generally involve uneven plasticization when a heating ring is damaged and discolored, and severe discoloration or even charring when the heating control section is out of control. Regular inspection of the heating section is essential during production. Meantime, we should timely carry out replacement and repair if damage or loss of control occur to reduce these types of color variation issues.
(2) If there is charred molten material accumulated at the barrel or nozzle, the barrel and nozzle should be thoroughly cleaned.
4. Molding Process Factors
(1) When adjusting injection molding process parameters for reasons other than color variation, try not to change the plasticizing temperature, back pressure, injection cycle, or the amount of color masterbatch added. If adjustments are needed, observe the impact of changes in process parameters on coloration, and if color variation is detected, promptly revert the changes.
(2) Avoid high injection speeds and back pressures in injection molding to prevent strong shear effects. These can cause thermal decomposition and color variation.
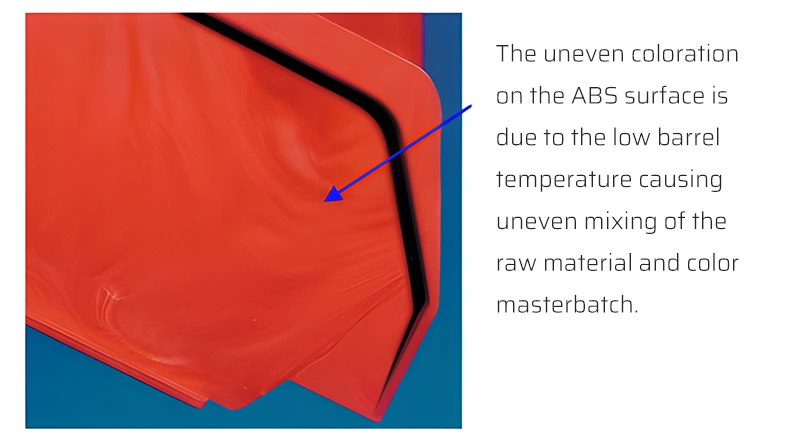
(3) Set reasonable temperatures for each heating section of the barrel, especially the nozzle and the section adjacent to the nozzle.
(4) Poor plasticization, i.e., the inability of the melt to fuse uniformly, can also cause uneven coloration of the product.
5. Mold factors
(1) Mold release agents and the debris from pin and pinhole friction mixed into the melt can cause surface discoloration. We should keep the mold cavity clean before injection molding.
(2) Poor mold venting can be addressed by reducing clamping force, repositioning the gate, and placing vent holes at the last filling location.
(3) Mold temperature has a significant impact on the crystallinity of the melt during cooling. Uniform cooling of the mold is essential, especially when molding crystalline plastics like polyamide. If the mold temperature is low, the melt crystallizes slowly, resulting in a transparent surface appearance; if the mold temperature is high, the melt crystallizes quickly, resulting in a semi-transparent or milky appearance. The surface coloration of molded parts can be controlled by adjusting the mold and melt temperatures.
Solutions for Uneven Color
1. Raw Material Factors:
(1) Control raw materials and strengthen inspection of different batches.
(2) Dry raw materials thoroughly, ensuring consistent drying parameters for each cycle.
(3) Inspect colorants to eliminate the impact of raw materials and colorants.
(4) Use volatile lubricants and mold release agents in appropriate amounts.
(5) Adjust colorants appropriately for different raw materials where product colors are the same.
(6) Adjust colorants accordingly for products with varying surface requirements caused by inconsistent textures. This minimizes visual color differences perceived by the eye due to varying light conditions.
2. Mold Factors
(1) Increase mold venting to avoid poor venting and product scorching.
(2) Adjust the mold gating system.
(3) Easily increase venting at dead angles in the mold.
(4) Design the mold water channels reasonably, and design water channels in deep cavity locations.
3. Molding Process Factors
(1) Reduce injection pressure and screw pre-plasticization back pressure to prevent shear overheating
(2) Understand the impact of barrel temperature and colorant amount on product color changes, and determine the pattern of changes through color testing.
(3) Too high injection speed, reduce injection speed: use multi-stage injection: fast-slow.
(4) To prevent color variation, avoid local overheating and decomposition. Strictly regulate temperatures in each heating section of the barrel, focusing on the nozzle and nearby areas.
4. Injection Molding Machine Factors
(1) Ensure cleanliness in the injection molding workshop, injection machine, and mold.
(2) Regularly inspect heating components during production and promptly replace or repair damaged or out-of-control elements to reduce the likelihood of color variation.
(3) Choose injection machines of appropriate specifications to address issues such as material dead angles.
(4) Adjust the appropriate screw plasticizing speed.
Final Words
In today’s era of intelligence, automation, and technology, FirstMold calls on all peers and customers to use colorimeters for color difference inspections. Establishing scientific acceptance standards will play a crucial role in driving progress and improvement in the entire injection mold industry.
