In the world of product development, bringing a product from a beautiful 3D design to a tangible, physical object is a challenge. Most people never stop to think about the technical aspects behind these simple objects that fill our lives.
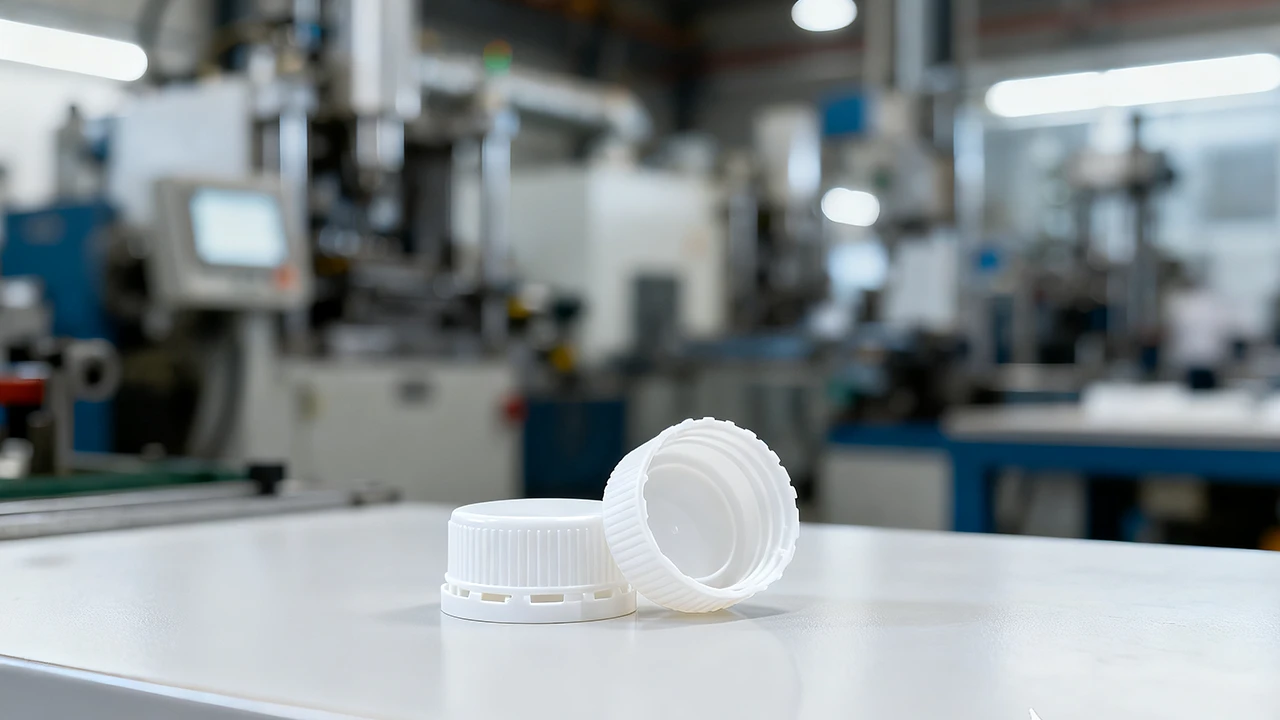
Injection molding is a production process where a material is melted into molten form, then it is injected into a mold cavity to produce parts. A heated barrel melts the material, and after injecting it into the mold cavity, it cools and solidifies, forming the features of the desired part. Material used may include plastic, metals, glasses, and the most common thermoplastics and thermosetting polymers [1].

In modern manufacturing, injection molding has become the cornerstone of production. For instance, consider a machine that processes for a few seconds per cycle. If it operates for a full day, it can produce thousands of parts. Such high production rates make industries meet market needs quickly. Also, a tightly sealed mold can form a part, no matter how complicated it is.
Additionally, its ability to allow different materials makes it suitable for diverse applications. Plastic materials have dominated this industry compared to other materials like metals. That’s why if someone doesn’t specify the material, it’s safe to assume they are referring to plastic injection molding.

History of Injection Molding
The first patent for an injection molding machine was issued in 1872 by John W. Hyatt and his brothers. It was a simple plunger-style device, like a syringe, that injected celluloid through a heated cylinder and into a mold. It produced simple parts like buttons, hair combs, and collar stays.

In the early 1900s, German chemists Arthur Eichengrün and Theodore Becker invented a soluble form of cellulose acetate that was less flammable than cellulose Nitrate.
In the 1940s, the lead-up to World War II, demand for cheap and mass-produced products escalated, skyrocketing the industry’s experience. There was a great development of many thermoplastics, such as polyvinyl chloride (PVC) and polystyrene, which are still relevant even today. The war affected traditional resources like metal and rubber, reducing their availability. Plastics presented a solution, and injection molding made it possible to produce plastic parts efficiently. The development of the extrusion screw injection machine in 1946 by James Watson Hendry brought about advances in the plastic injection molding process, which is still the standard today. It allowed greater control of the injection process, leading to the production of high-quality parts [2].
Inside the Injection Molding Workflow
The workflow cycle of injection molding can be broken down into 6 key steps. This repeatable cycle facilitates the mass production of similar parts with high efficiency.

1. Clamping
The mold clamping system consists of two halves that allow for the opening and closing of the mold. This is done with greater force to prevent it from opening during injection under high pressure. The process requires high precision with “slow-fast-slow” speed change to reduce damage to the mold and product, and minimize noise due to strong vibrations. The size of the molding press determines the time for this step.
2. Injection
Once the mold cavity is fully closed, the heated barrel and melted plastic pellets are turned into a molten state. The liquid is injected into the mold under very high pressure to fill every detail of the cavity. Constant temperature is expected throughout this process.
3. Dwelling
After the molten plastic fills the mold, pressure is applied to it. The pressure is withheld to ensure the liquid fills every part of the cavity so that the part produced is completely identical to the mold.
4. Cooling
The molten plastic inside the cavity is left alone to cool and solidify into the desired shape. Cooling channels within the mold, through which water and oil circulate quickly, facilitate the cooling process. The part’s thickness and material properties influence cooling time.
5. Ejection
Upon cooling, ejector pins push out the finished part when the mold opens. They are strategically positioned to prevent damage to the part. The mold closes and the cycle continues.
6. Post-Processing
After ejection, the part might still be warm, so further cooling is required. Further secondary operations, such as trimming excess materials, painting, and assembly, are done. Quality checks and waste material can be recycled and reinjected back into the process.
Understanding the Types of Injection Molding
Injection molding processes depend on the product requirements. Their classification is according to specialized systems, material, and mold design.
Classification by Mold Design
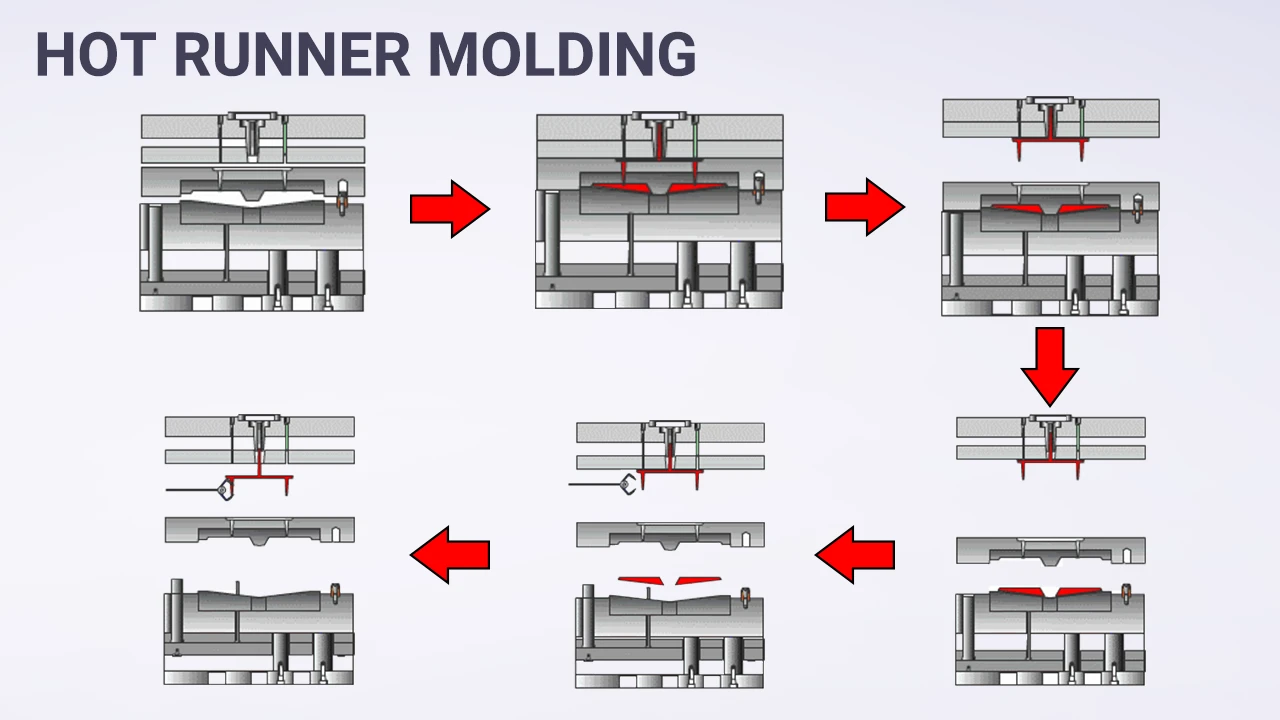
Hot Runner Molding
Hot runner molding is a feeding system with heated manifolds of rods or coils to keep the plastic molten, preventing it from solidifying. When ejected, the finished part comes out without the runners. The molded part comes out clean without extra plastic, which reduces waste and cycle time. Hence, there is no need for regrinding and post-processing.
Some limitations of hot runner systems include high setup and maintenance costs. Skilled specialization is also needed to supervise the process. It’s also challenging to clean the runners or ensure the plastics have run out entirely, as they are hidden. This becomes an issue when dealing with color changes or heat-sensitive materials.
Cold Runner Molding
The runner system is unheated, and the plastic will solidify together with the part. Upon ejection, the runner is separated from the finished part by cutting or trimming. However, this depends on the mold plate used, as some may separate. They are easier to maintain, clean, change color, design iterations, and work with different materials since the gates and runners’ positions are changeable.
One disadvantage of this system is that it generates excessive waste with every cycle. The possibility of regrinding and reprocessing affects the final product since repeated use alters its properties.

Classification by Injection Molding Materials
Plastic Injection Molding
The most widely used form of injection molding, utilizing thermoplastic polymers and thermosetting resins as the raw materials. The heating of plastic pellets turns them into molten plastic, feeding them into the mold cavity. Upon cooling, they match the shape of the mold. Thermoplastics do not experience significant degradation of their material properties even after repeated use. Thermosets undergo chemical change after heating, so they are difficult to reuse.
Tips: Typically, when people refer to “injection molding,” they are mostly referring to “plastic injection molding.” If you have plastic products that need to be manufactured, we recommend you visit the “Plastic Injection Molding Services” page to get more information.

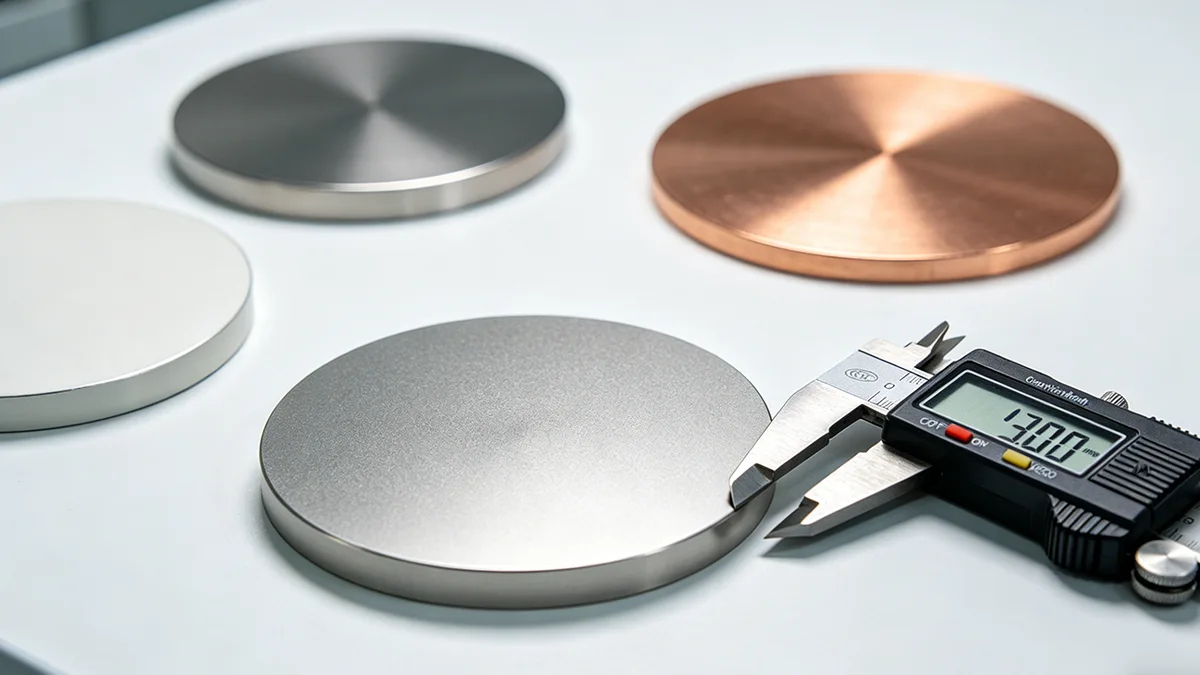
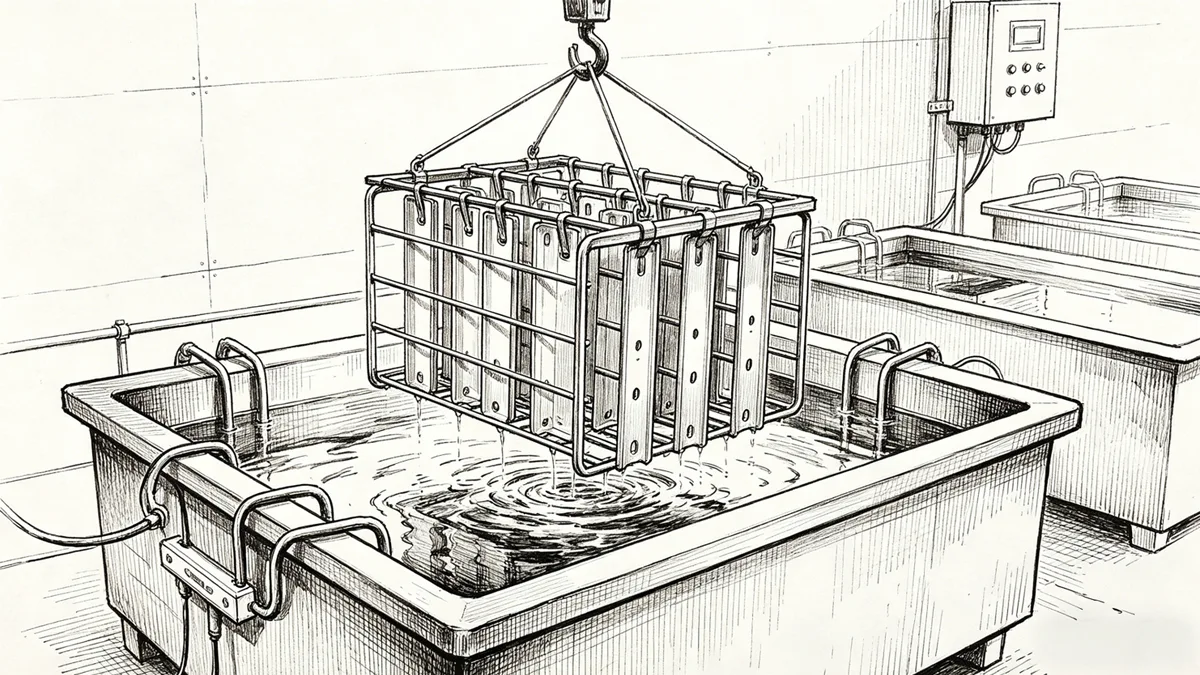
Metal Injection Molding (MIM)
Uses feedstock of fine metal powders (stainless steel, titanium) mixed with a plastic binder. Similar to plastic injection, it is heated, injected, and cooled into the mold. The part that cools off is called the “green part”; however, the process is not complete yet. The green part undergoes further processing, including debinding and sintering, to remove the plastic binder and apply high temperatures to fuse the metal particles of the final part.
It’s advantageous for creating metal parts that were previously not possible using traditional methods. However, its major limitation is that it’s somewhat expensive and limited to small-sized parts and lower volumes.
Tips: Click to check more information about “MIM Technology“.

Classification by Specialized Processes
Gas-Assisted Injection Molding
A pressurized inert gas (Nitrogen gas is used) is injected into the mold after the molten plastic forms a hollow section, thereby increasing the rate of cooling. Helps in reducing warping and parts achieve a smooth surface finish. However, it’s only applicable for single-cavity molds with some materials reacting with the gas and changing their properties.
Tips: Click to learn more about “Gas-Assisted Injection Molding“.

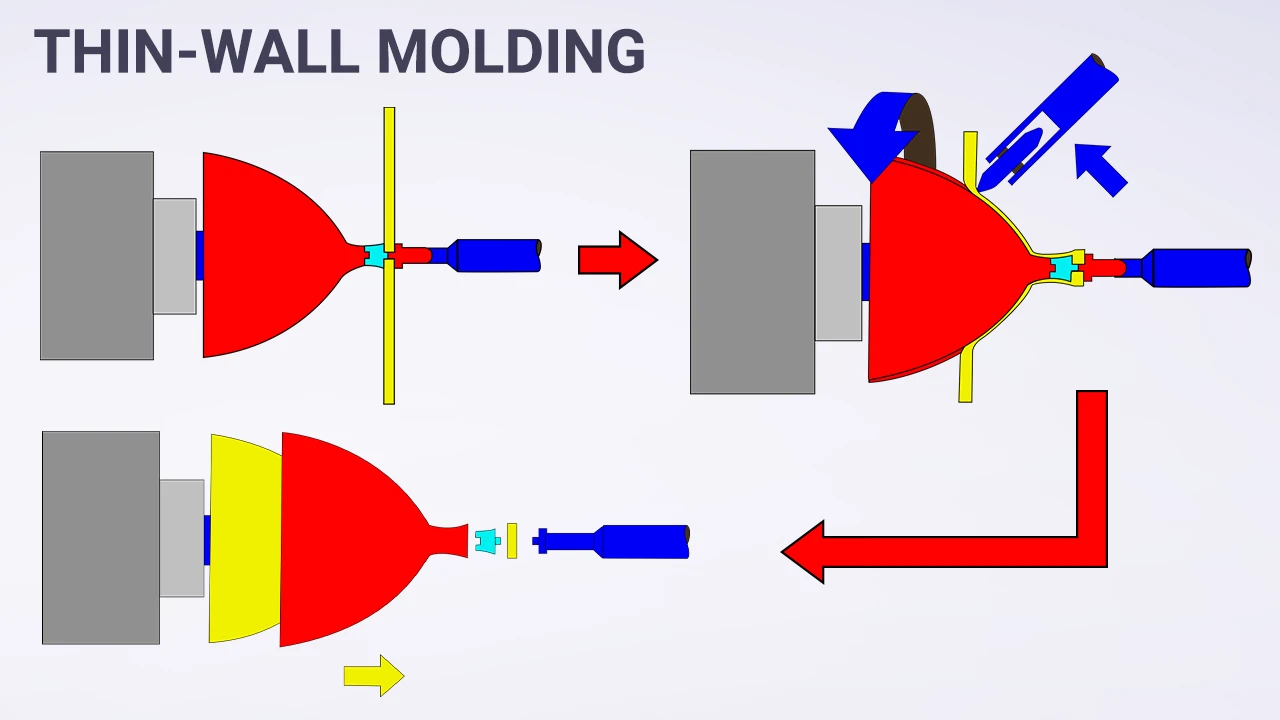
Thin-Wall Molding
Thin walls minimize material usage and save costs. This process creates parts with very thin walls (1-2mm). Specialized machines are needed to inject plastic at the highest precision and pressure to fill the mold cavity fully. Helps in resource saving when compared to traditional methods.
The downside of this process is that these molding machines are very expensive and require specialized personnel. High-level precision is non-negotiable for thin-wall molding since there’s no room for errors.
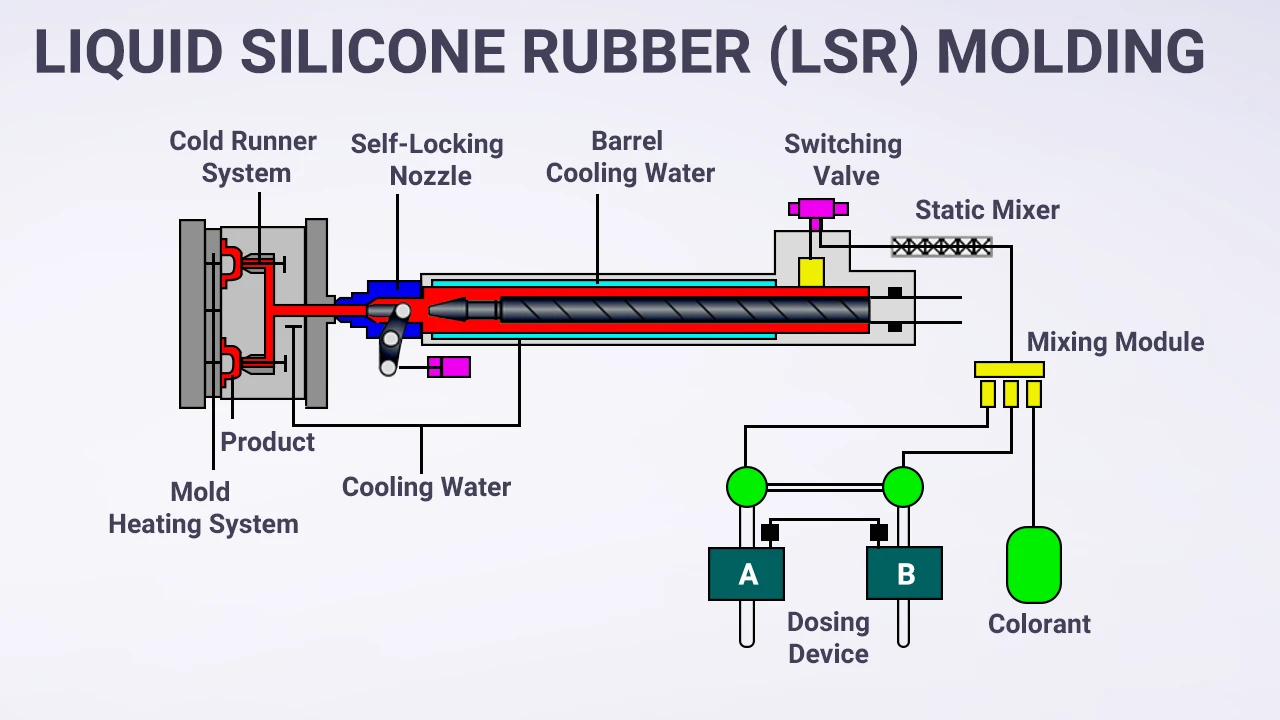
Liquid Silicone Rubber (LSR) Molding
It is designed for large-scale production of rubber products. Thermoset Silicone rubber is injected into a heated mold cavity and vulcanized. It’s advantageous to store as liquid silicone, eliminating the need to melt. It also solidifies quickly and produces less waste. On the other hand, once Silicon is vulcanized, the process is irreversible, and most of these silicone products cannot be recycled.
Tips: You may also be interested in “Rubber Injection Molding“.
Two-Shot Injection Molding
involves combining two different materials or two colors of the same material in a single mold cycle to form a single complex part. The process uses a highly automated special machine with two injection units. During the first shot, a rigid material like ABS plastic is injected into the cavity and forms the first part. The mold then rotates, and the second material, like soft thermoplastic, is injected into the new cavity and bonds with the first part. Upon completion, the two-material part is ejected, which has structural and aesthetic integration without new assembly.
Tips: Click to see “How two-shot injection molding works“.

Overmolding
Is the process of molding one material on top of a pre-existing part. It occurs by placing the first part mold and then injecting another material into it. This method is useful in creating robust parts with combined properties of products like grips, tool handles, or toothbrushes.
Tips: Click to gain a deeper understanding of “Overmolding“.

Insert Molding
It involves placing metal or plastic inserts (pre-formed) into the mold, then injecting plastic. The plastic then solidifies and forms around the insert. This technique creates products with combined material properties and eliminates post-assemblies. However, this process makes it difficult to disassemble the product for repair and recycling.
Tips: Click to learn more about “Insert Molding“.

Core Components of the Injection Molding Machine and Mold
The entire Molding process relies on core components working together to transform raw material into a finished product.

Injection Unit
- A hopper is the component where the pellets feed into the barrel/screw.
- The Barrel/Screw heats the material into a molten state for easier flow.
- The Nozzle is a small opening that connects the ejector system and the cavity at the bottom of the machine.
The plastic pellets are fed through the hopper to the barrel. The barrel injects the molten liquid through a nozzle. Some other channels (individual runners) transfer the flow from the Nozzle to the injection gate entry to the cavities.
Clamping Unit
- The Mold platen is responsible for holding mold halves.
- Tie Bars align the moving platen and provide structural support to avoid deflection, which could cause flash.
- The ejector system uses a dual-action mechanism that facilitates the removal of the part.
The movable platen with one half moves towards the stationary platen with the other half. The tie bars guide this movement to ensure the platen closes with perfect alignment. The closing forces are enormous to keep the two halves tightly sealed under high pressure during injection. Afterwards, the ejector system on the movable platen is activated. The ejector pins push out the finished part.
The Mold Cavity
Formed by two sections. The stationary side and the moving side that control the opening and closing of the mold. Houses the runner system and maintains the alignment of the moving side through bushings and guide pins. Its alignment determines the precise dimensions and smooth removal of the product.
Tips: You may also be interested in the detailed information about “mold cavities and mold cores“.
The Feed System
- The guide pins align the mold halves during the process.
- Sprues and Runners are the entry point for molten plastic.
- The gate is a small opening that controls the flow of material in the mold cavity.
The sprue, runners, and gates work together to direct the molten plastic from the injection unit to the mold cavity. The sprue connects the nozzle to the runner system. The runners distribute the molten flow onto the mold cavities through the gates.
The Cooling Channels
They are holes within the mold halves that circulate water or oil to regulate the temperatures. They house a thermo-regulator unit that keeps the temperature of the fluid under control. Cooling maintains consistent thermal conditions inside the cavity, affecting the part quality and cycle time.
The Ejector System
- Ejector pins: Are steel pins located behind the mold cavity. They are pushed forward when the mold opens.
- Ejector plates: where the pins are mounted.
- Return Pins: They push the ejector plates back when the part is ejected.
The ejector plates push the pins forward; the part is pushed out of the mold. Then, the return pins push the ejector plates and pins back to their original position to prepare for the next cycle. When the system has fully reset, it releases a “pop” sound signaling complete retraction. Delicate parts are removed using hydraulic ejectors for high precision, while mechanical knock-out bars ensure consistency in part removal.
Tips: Click to understand all information related to “ejector pins“.
Regarding the composition of molds, there is a very detailed article here that helps you understand all components including cavity, core, and mold base. Please click on “Composition of Plastic Injection Molds“.

Common Injection Molding Materials and Their Properties
Polymer materials are the very foundation of plastic injection molding. Polymers or plastics, as they are known, are large molecules with repeating units. All plastics are polymers, but not all polymers are plastics. Their differences fall in their physical and chemical properties.
Polymers are natural chemical compounds made up of a chain of chemically-bonded molecules (monomers). Single types of monomers are called homopolymers. Two or more monomers form a copolymer. The advantages of using polymers are that they do not release toxic fumes upon burning.
Plastics are synthetic polymers extracted from petroleum through the process of polymerization. There are two categories of plastics:
- Thermoplastics: Have linear or branched chains. They are soft when heated and harden upon cooling.
- Thermosetting: Undergoes irreversible changes once set/heated.
- Elastomers: Exhibit rubber-like elasticity. They can go back to their original form after heating.
Since plastics are considered polymers, they exhibit similar structures to those of polymers. Key benefits of using plastics are low production cost, high strength-to-weight ratio, and their versatility [3] [4].
Apart from using polymers as the core material for injection molding, other materials, such as metals, are used. The process is referred to as metal injection molding (MIM). Most metal materials used in MIM include: Ferrous Alloys (Tool steels, Stainless steel, Iron-nickel magnetic alloys, Kovar &Invar” special alloys”), Tungsten alloys, Hard metals (cemented carbides), and special materials like composites.

The following table will guide you through the types of polymer materials used in injection molding and their applications.
Table of Properties and Applications of Common Injection Molding Materials
| Category | Material (Abbr.) | Key Properties | Applications | Notes |
|---|---|---|---|---|
| General Purpose | PP | Lightweight, Chemical resistant | Containers, Automotive parts | Most versatile and cost-effective plastic. |
| PE | Impact resistant, Electrical insulator | Toys, Cable insulation | Available in HDPE and LDPE grades. | |
| PS | Rigid, Low cost | Tableware, Packaging | Exists as crystal (GPPS) and high-impact (HIPS) grades. | |
| PVC | Flame retardant, Weather resistant | Pipes, Cable sheathing | Can be rigid or flexible with plasticizers. | |
| ABS | Impact resistant, Good finish | Electronics housings, Auto interiors | Perfect balance of strength, cost, and processability. | |
| Engineering Plastics | PA | High strength, Wear resistant | Gears, Bearings | Known as Nylon, requires pre-drying. |
| PC | Impact resistant, Transparent | Safety glasses, Electronic components | Exceptional toughness but prone to scratching. | |
| POM | High stiffness, Low friction | Precision gears, Zippers | Often called ‘acetal’, behaves like metal. | |
| PET | High strength, Good barrier | Bottles, Engineering parts | Requires specialized grade (PETG) for clarity. | |
| PBT | Chemical resistant, Dimensionally stable | Connectors, Automotive components | Crystallizes faster than PET for easier molding. | |
| High Performance | PPS | High heat resistance, Chemically inert | Automotive sensors, Industrial parts | A superb, highly durable engineering polymer. |
| PEEK | Heat resistant, Mechanically strong | Aerospace parts, Medical implants | Top-tier performance with a high cost. | |
| PEI | High strength, Flame retardant | Sterilizable trays, Aerospace interiors | A high-performance, transparent PC alternative. | |
| Elastomers | TPE | Soft touch, Recyclable | Grips, Seals | Can be molded like plastic but feels like rubber. |
| TPU | Abrasion resistant, Elastic | Phone cases, Shoe soles | Outstanding wear resistance among elastomers. | |
| TPV | Weather resistant, Durable | Automotive seals, Weather-stripping | Excellent replacement for thermoset rubber. | |
| Bio-Plastics | PLA | Biobased, Compostable | Food containers, 3D printing | The most common bioplastic, but heat sensitive. |
| MIM Metals | 316L | Corrosion resistant, Strong | Medical tools, Watch cases | Ideal for small, complex metal parts via MIM. |
| 17-4PH | High strength, Hardable | Firearm components, Dental tools | Can be heat-treated after molding for high strength. | |
| NMT Metals | Al alloy | Lightweight, Good strength | Phone frames, Laptop cases | The primary metal for NMT plastic hybrid parts. |
| Mg alloy | Very light, High strength | Drone frames, Electronic housings | Excellent strength-to-weight ratio for NMT. | |
| Stainless Steel | High strength, Corrosion resistant | Wearable devices, Car keys | Provides a strong metal skeleton via NMT. |
Modified Materials
Injection molding materials are used in so many applications. To enhance their performance, these materials are often modified with other polymers or additives. Some of the modified materials may be;
- Glass fiber modified plastics: Adding glass fibers to materials like nylon and polycarbonate. They make them stronger and stiffer.
- Carbon fiber reinforced plastics: Applicable where a strength-to-weight ratio is highly needed, like in aerospace components.
- Mineral-filled polymers: Minerals such as calcium carbonate and talc enhance stiffness in polymers.
- Polymer blends and alloys: They involve mixing different polymers to build a new material. Example PC&ABS creates an excellent material used in Automotive dashboards and computer casings.
- Additives addition: commonly used additives include: colorants and dyes, UV stabilizers, plasticizers, and Flame retards. These additives add to the polymers’ functional properties.

Choice of polymer material for a specific purpose is a headache for Engineers. However, with the right strategies and by answering the right questions, one will choose the most suitable materials. Here’s an in-depth guide on what to consider to find out what best suits your objectives.:
- The part’s requirements: Is the part supposed to be strong, durable, transparent, elastic, or soft? Will it be used for food or medical purposes? Is it for outdoors? Answering these questions is the first step in finding the right material for the product.
- The budget: Cost is the major factor, with the most affordable material being the first to consider. To break it down, commodity plastics like PP are most affordable, Engineering plastics like PC & Nylon have a higher cost, and modified plastics are the most expensive.
- The Operating Environment: Consider where the product will be used. Will it be subjected to environments like temperature, acidity, alkaline conditions, stress, and strain, among others? This will help you eliminate unsuitable materials.
- Material’s mechanical properties: These properties explain how a particular material grade should behave under certain conditions. The part must withstand various physical forces depending on where it’s used.
Advantages and Limitations of Plastic in Injection Molding as Compared to Other Materials
Injection molding uses different materials. At the heart of it, plastics have become dominant with a unique set of advantages and limitations.
| Advantages | Limitations |
|---|---|
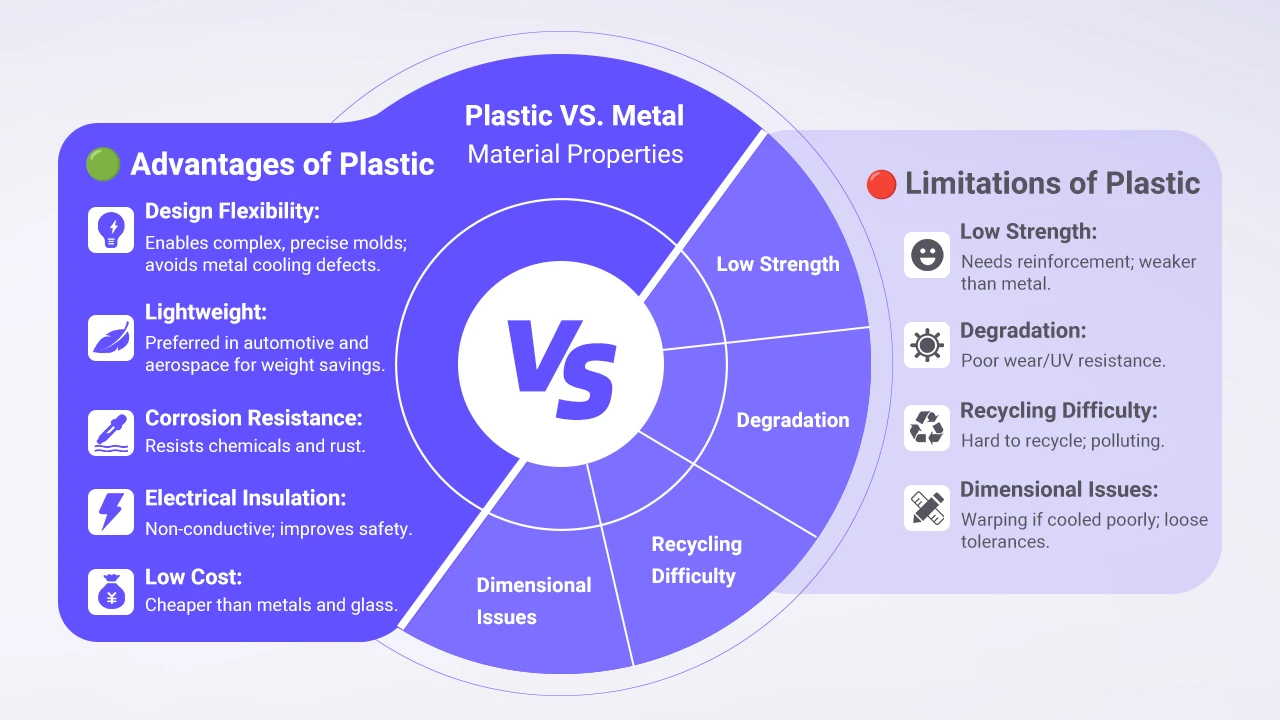
| Design flexibility in creating complex geometries and intricate designs (overmolding). Molten plastics can reach every part of the detailed cavity. Other materials, like metals, have limited flow and cooling stresses, risking defects like wrapping. | For structural capabilities like strength and stiffness, plastics cannot compare to metals. That’s why most of them are reinforced with materials like fiber to improve their strength. |
| Plastics are lighter than other materials like metals, making them significant in applications such as automotive and aerospace. | Plastics are susceptible to wear and UV degradation, especially where they face high friction and heat. |
| Unlike metals, plastics can resist corrosion and chemicals. | Using plastics has caused a lot of environmental problems, mainly because it’s hard to recycle plastics without losing their properties. |
| Plastic components are ideal for electrical band heat insulation, reducing the risk of shocks, while metals are natural conductors. | Plastics have dimensional instability, such as deformation, if not designed or cooled appropriately, while metals and ceramics can achieve high tolerances. |
| Plastics are relatively cheap to manufacture when compared to traditional materials like glass and metal. |
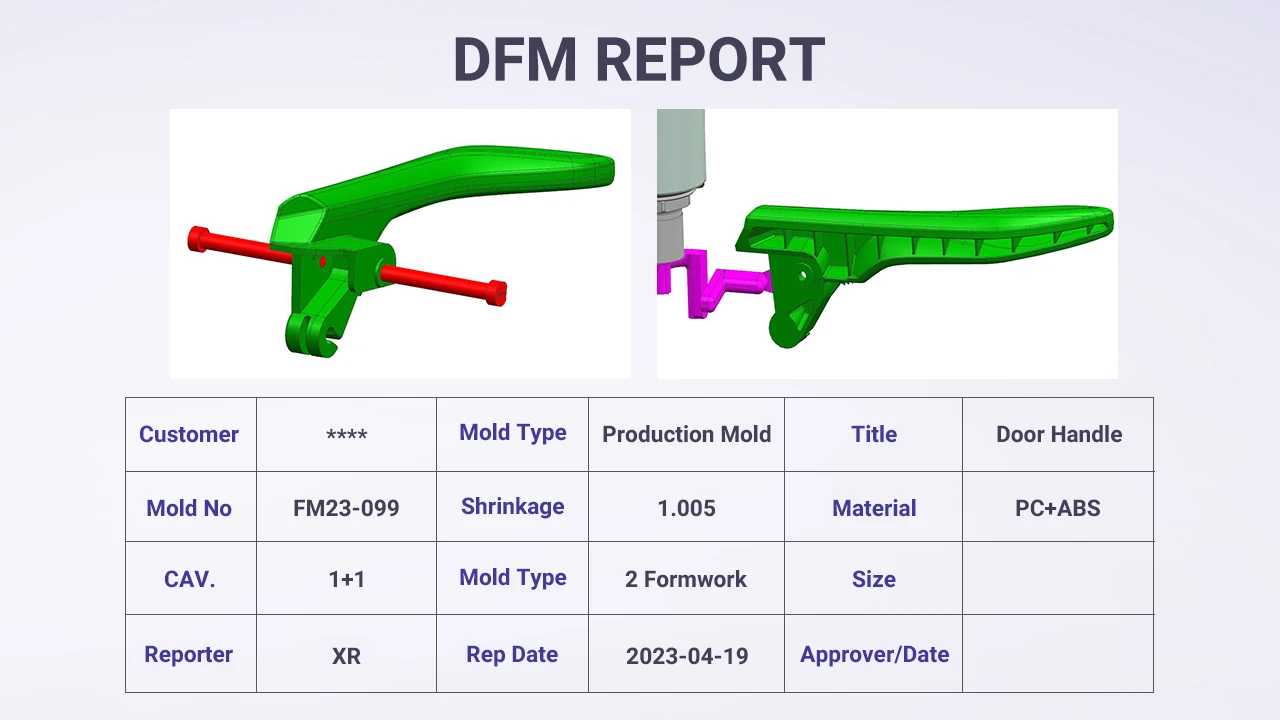
Design for Manufacturing (DFM)
For a product to succeed and perform well in the market, its success largely depends on the decisions made during the design and engineering phase. DFM involves designing a part or product to work with the specific limitations and manufacturing processes. All professionals (designers, engineers) get involved from the very beginning to help prevent problems like cost, delays, and time wastage. Fundamentally, this is a service that any injection molding factory should provide to its clients. However, some factories include DFM as a part of their standard quote, while others may charge for it as a separate service. But all this depends on the scope of the project and negotiation between the client and the factory [5].
Core Principles of DFM in Injection Molding
- Uniform Wall Thickness: A consistent wall thickness of the part is significant. For instance, a 2-3mm uniform thickness ensures even cooling to prevent defects like voids and sink marks.
- Draft Angles: A draft angle is a taper added to a vertical wall to allow smooth ejection and prevent the part from sticking or getting scratched. A draft angle of 1°-2° on smooth surfaces, 5° on untextured surfaces, 3° on light textures, and 5° or more on heavy textures is recommended.
- Radii and Fillets: They help reduce stress to corner points and allow the material to flow easily. The radius of the fillets should be 25-50% of the normal wall thickness.
- Ribs, Bosses, and Gussets: Ribs add reinforcement to walls without making them look thick and prevent warping. They should be 40-60% of the normal wall thickness. Bosses are cylindrical and serve as mounting points for fasteners, while also helping in component alignment. Should not exceed 60% of the overall wall thickness. Gussets are triangular and reinforce ribs and bosses, making them more stable.
- Undercuts: an undercut (clips, hooks) hinders the smooth ejection of the part. Avoiding these features reduces tooling cost.
- Corners: adding corners on sharp edges minimizes stress. Round corners also reduce shrinkage. Internal radius should measure 50% of the wall thickness. External radius is the sum of the wall thickness and the internal radius.

Tips: You may be interested in “Full Guide to DFM” and “What is Mold Flow Analysis“.
The Role of Injection Molding in Industrial Applications
Injection molding delivers the unique specifications and qualities needed for various industries. It has played a critical role in solving some manufacturing problems for industries.
Automotive Parts Making
The automotive industry needs a durable, single, and lightweight interior dashboard that can accommodate vents and other components while maintaining its aesthetic. Injection molding can produce dashboards as a single piece without the need for assembly. Using polymers like ABS, we design molds that resemble their shape, incorporating complex features and textures. Different types of molding, such as overmold and two-shot, improve the dashboard’s look and feel.
Other applications of injection molding in the automotive industry include:
- Bumpers
- Mirror housings.
- Cup holders.
Consumer Electronics Components Production
Consumer electronics production of thin, lightweight, and strong smartphone casings that protect sensitive inner electronics. With advanced injection molding capabilities, plastics like polycarbonate are durable and incredibly light. Inclusion of ribs and bosses for support, mounting points for circuit boards, and cutout ports in a single manufacturing cycle.
Other standard components in this industry include:
- Electrical switches.
- Cases and enclosures for circuit boards.
- Conduits.
- Components for laptops and desktops.
Medical Device Parts Manufacturing
The medical industry’s design and manufacture of insulin pen injectors are revolutionizing diabetes care. They have replaced the error-prone syringes with portable, measurable dose syringes. Using IM, it’s possible to manufacture ergonomic designs (dials and buttons), which helps in self-administration. PC and ABS materials are known to maintain sterility. Manufacturing these pens in large quantities reduces the unit cost, making them affordable to the
- General public.
- Other medical items that are produced through IM are
- Catheters.
- Tubes.
- Implants.

Aerospace Components Making
The aerospace industry’s need for aircraft cabin components that are durable, lightweight, and robust is crucial for guaranteeing passengers’ safety and lowering fuel consumption. IM uses specialized, high-performance polymers such as PEEK and PEI, which are lightweight and strong. Similarly, with the ability to create complex geometries, it’s possible to produce parts like air vent frames and seatbelt buckles for the cabin.
Some other parts manufactured through Injection molding are:
- Panels
- Chassis components.
- Brackets and mounts.
- Cockpit Components.
Packing Products Production
The packaging industry utilises plastic materials for food and beverage storage facilities. These containers must be food-grade, low-cost, and durable. Injection molding dominates this industry by creating a wide range of containers with food-grade materials like PET and PVC. Parts production occurs in large volumes with all sorts of designs and shapes. HDPE containers are manufactured with lids and handles at an extremely low cost.
Other commonly-manufactured parts for this industry are:
- Conveyor systems.
- Overcaps.
- Components of processing equipment.
Manufacture of Small Construction Components
The construction industry’s need for building materials like pipes and fittings used in plumbing and drainage systems requires efficient production methods. Using PVC materials to create parts like elbows, couplers, and tees helps in corrosion resistance. Their high strength to prevent leakages. These parts are produced in large quantities to ensure there is a continuous supply to meet the demands for construction.
Commonly-produced elements in the construction industry include:
- HVAC system product.
- Window and Door parts.
- Insulation and Fasteners.
- Handheld Power Tool Casings.

Injection Molding Cost and Optimization
Cost management is the focal point for the success of any injection molding project. IM is preferable due to its low unit cost with high-volume production. Careful cost consideration is essential for peak performance in these critical areas: tooling, materials, and production [6].
The Two Core Costs: Tooling(Mold) vs, Unit price (Part)
Tooling Cost is the largest upfront investment in injection molding. Molds can cost thousands of dollars, depending on the machining process used in mold making and other factors such as the type of material.
Unit price (part) is the cost incurred for producing each part during production. It involves labor, machine time, and material cost.
Key Factors Driving Mold Cost
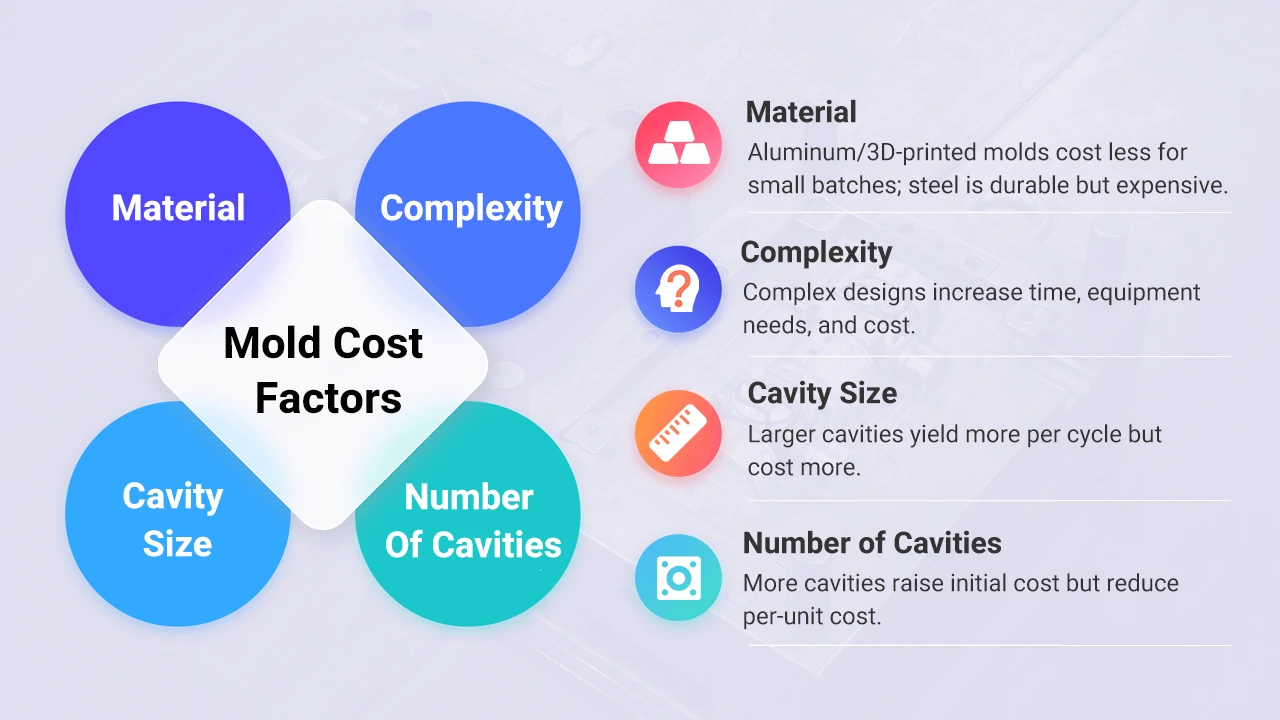
Mold Material: Materials vary in durability and cost, affecting the overall efficiency of the manufacturing process. Aluminum and 3D printed molds are less expensive and more suitable for low–volume production. On the other hand, the expense of steel provides extended tool life.
Mold Complexity: The design and manufacturing costs of molds with complex geometries are a bit higher. Specialized machines are required for these molds and have longer production times. Balancing between these costs and design considerations is therefore essential.
Mold Cavity Size: Large cavities can hold large volumes of materials and produce more parts per cycle. However, due to the size of the molds, they are more expensive. On the contrary, smaller cavities are cost-effective due to their simplicity and reduced material usage.
Number of Cavities: Multiple cavities create more parts per cycle, increasing tooling cost but lowering cost per unit.
Strategies for Cost optimization (Factory Side and Client Side)
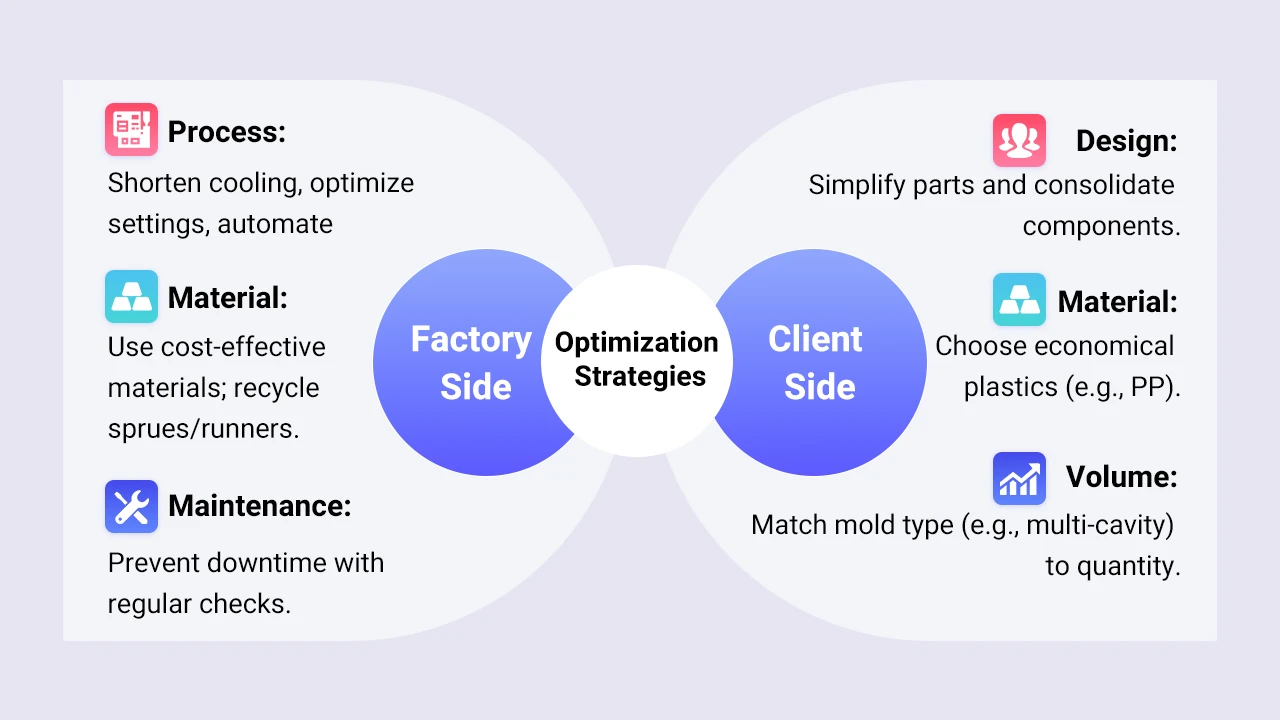
Factory Side:
Process and Production: A few strategies within production can help optimize injection molding cost. They include: cooling times, fine-tuning machine settings, automating tasks to increase production rates, and lowering costs.
Material and Waste Management: Choosing available materials and less expensive ones can reduce costs significantly. Reducing materials wastage during the molding process by using hot runner systems or recycling leftover materials from sprues and runners.
Maintenance: Regular maintenance of production machines prevents unforeseen downtime, ensuring consistency.
Client Side:
Part Design: Simplifying the design reduces the time and cost of machining the mold. Combining different components into a single part minimizes the need for assembly and labor, reducing the overall cost.
Material Selection: The choice of material for the product directly affects the cost of production. Using plastics like polypropylene (PP) for a non-critical part may be cheaper and still serve the same purpose.
Production Volume: The number of parts produced determines the size of the mold used based on the client’s investment. For instance, a high-volume project requires more durable, multi-cavity molds, affecting the upfront investment.
Tips: First Mold has prepared a professional article that details injection molding costs. You can click to learn about the specific components of injection molding costs and methods to reduce them.
Common Defects in Injection Molding and Acceptance Standards for Injection Molded Products
The injection molding process is a trusted method of manufacturing for its versatility and efficiency. Despite that, it does not happen without particular challenges, such as defects that may arise and lead to significant problems like compromising the product’s integrity. They can alter cost efficiency, speed, and shorten the product’s lifespan. They result from poor design, quality control failures, mistakes in the production process, and many more.

For an in-depth guide to defects, see this technical document injection molding defects.
If you are interested in each type of injection molding defect, you can refer to the table below to navigate to the corresponding page for a more in-depth understanding.
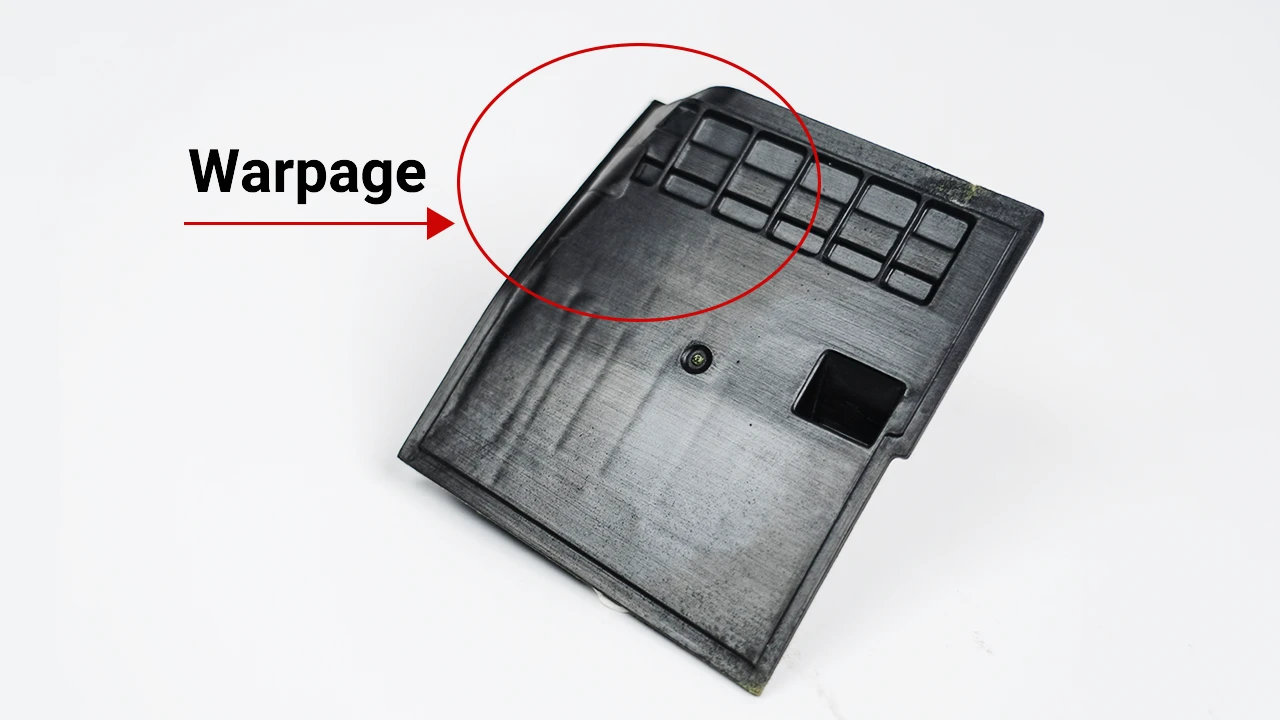
| Short Shots | Flash | Warpage | Bubbles | Burn Marks |
| Discoloration | Silver Streaks | Weld Lines | Sink Marks | Flow Marks |
| Ejected Marks |
The acceptance of a molded product is the acceptable level of defects. This depends on the specific standards and criteria that your part must meet, including surface finish, functional performance, and dimensional accuracy. For a breakdown of how a real-world quality control process ensures part acceptance, check here: Quality and Acceptance Standards for Injection-molded parts.
Quality Control For Injection Molded Parts
Quality control in injection molding ensures that parts produced meet all the required specifications. These specifications include: pre- and post-production checks, and monitoring ongoing processes [7].
Dimensional Tolerances are the variations that are accepted when dealing with a part’s dimensions. For instance, when producing identical parts, it’s impossible to deliver a complete match. These tolerances have some limits before they are considered a defect. This is helpful in assembly to ensure all parts fit together.
Geometric Dimensioning and Tolerancing (GD&T) is a language that defines the functional need of a part’s geometry. It’s mostly used in engineering drawing to control the forms, location, and orientation of features. GD&T helps in the manufacture of molded parts that need to mate with other components. Designers use GD&T to guide them in dealing with non-critical features and loosen tolerances, which lowers manufacturing costs.
Inspection Methods
Inspection methods should be applied to ensure the parts meet their dimensional accuracy. Some of these methods are:
- Visual Inspections: This is the first line of defense in checking for parts flaws like marks, flash, discoloration, or scratches.
- Calipers and Micrometers: Using manual tools for quick dimensional checks, but for complex geometries, more advanced tools are needed.
- First Article Inspection (FAI): A new mold goes through this check before starting its operations. All the features, dimensions, and notes included in the drawings are inspected and documented.
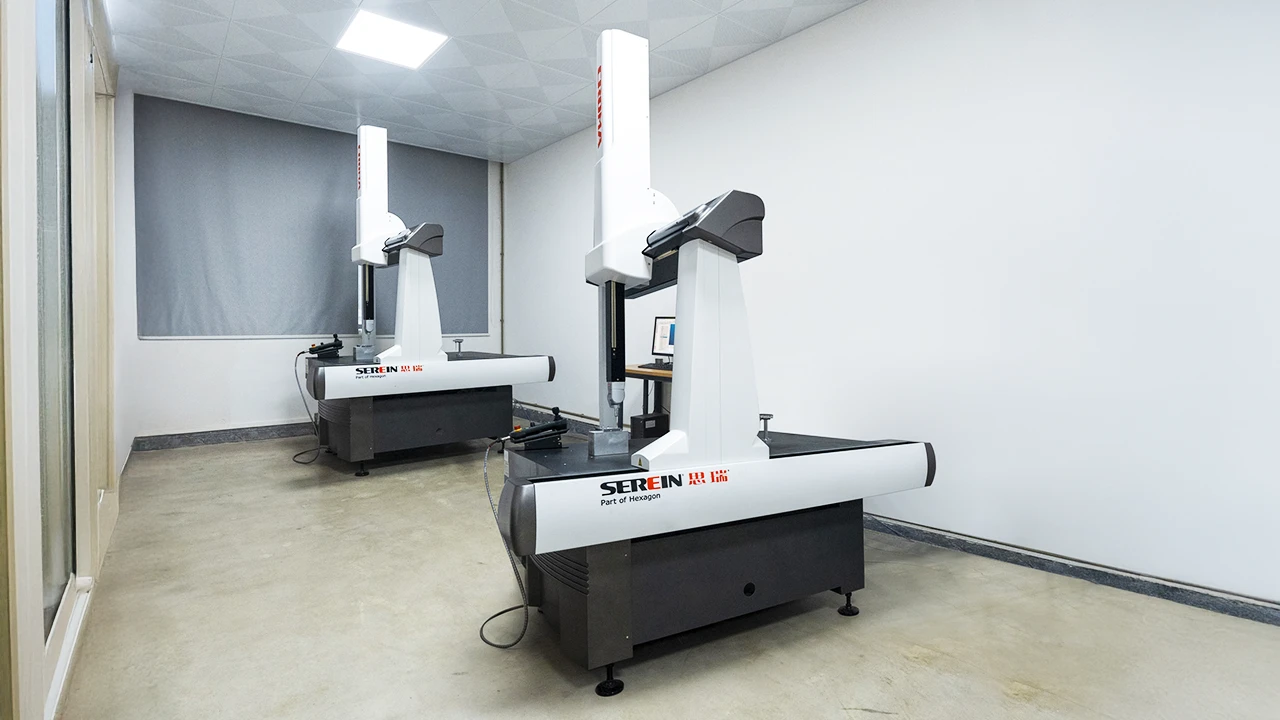
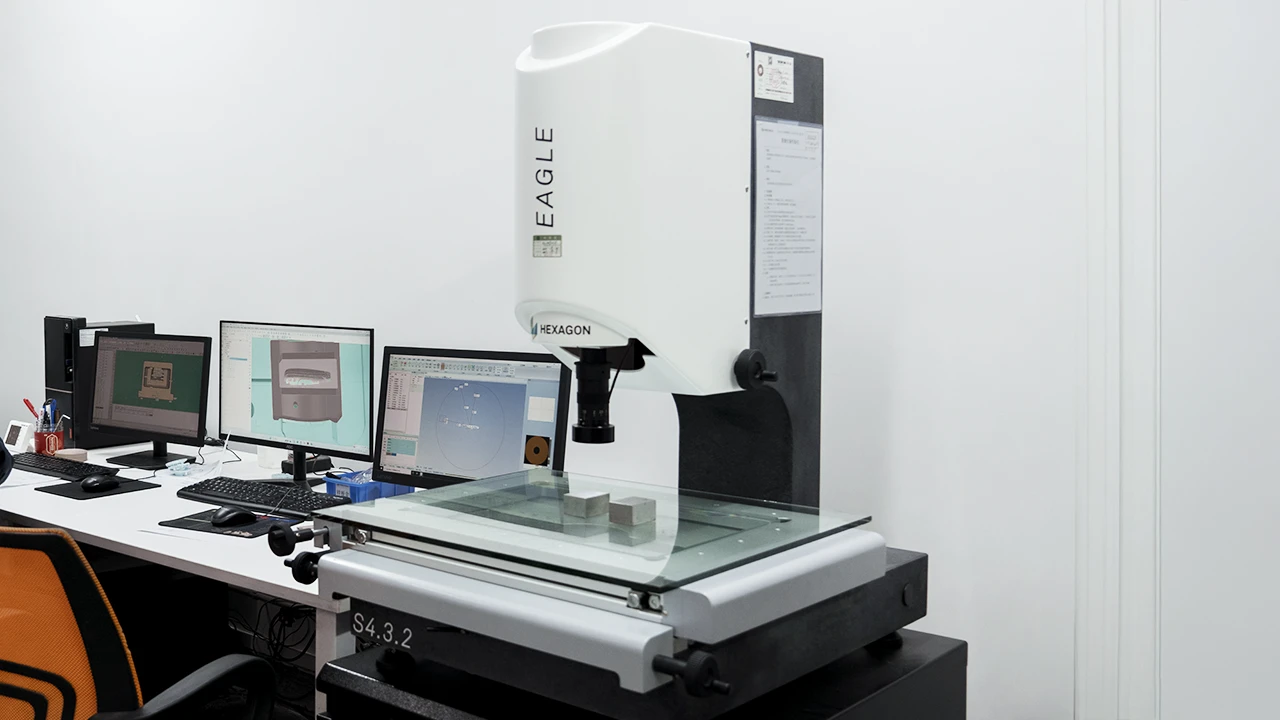
- Coordinate Measuring Machine (CMM): This is an advanced inspection tool that measures the dimensions of a product, especially complex parts.
Process Control and Monitoring
These are strategies employed to ensure the part’s quality during the production process.
- Real-Time Process Monitoring: Use of sensors embedded on machines to collect critical data like temperature, pressure, and time. This data helps to make quick adjustments and prevent defects.
- Statistical Process Control (SPC): Uses statistical data to monitor and control production. Control charts plotted guide the production process. If the data deviates from the acceptable range, it indicates there is a problem within the process.
- Cavity Pressure Monitoring: Sensors placed within the mold cavity measure the pressure of the molten plastic. They produce a visible curve that shows the part quality.

How to Choose an Injection Molding Supplier?
A rightful supplier for injection molding determines the success of your project. They affect not only parts but can also help save time and money.
Here’s how to choose the right one:
- Evaluate quality and Certifications: This is non-negotiable. Having certifications like ISO 9001 shows a supplier’s commitment to quality. Specialized industries have certifications like ISO 13485 for medical and IATF 16949 for Automotive products. Also, inspect their quality control process and the quality of equipment they use.
- Locations and Logistics: A local supplier reduces lead times and makes communication easier compared to overseas ones, leading to fast turnarounds. However, other aspects, such as labor and tooling costs, depend on who can offer affordable costs, which is vital for cost-effective projects.
- Quotes and Costings: Taking time to review quotes and comparing pricing is essential to get the most value-providing deal possible. Ask about MOQs for low-volume projects and tooling ownership.
- Assess their Capabilities: The supplier’s expertise must align with your project’s goals. The range of machines available, their experience in simple and complex projects, the post-molding process, and whether they offer DFM services are all factors to consider.
- The Supplier Contract: To offer protection to the firm and its products, reviewing the contract scope is essential to prevent future misunderstandings. Some elements of the contracts include: pricing, payment conditions, delivery schedules, etc.
Tips: First Mold recommends you read:
- 8 Recommended Online Injection Molding Suppliers
- 10 Recommended Injection Molding Companies in Mexico
- 10 Recommended Injection Molding Manufacturers in China
Injection Molding Markets and Trends
Recent developments have led to the growth of IM. The income from the sale of plastics to the IM industries is the source of the market’s projections and estimates [8] [9].
Global Market Overview
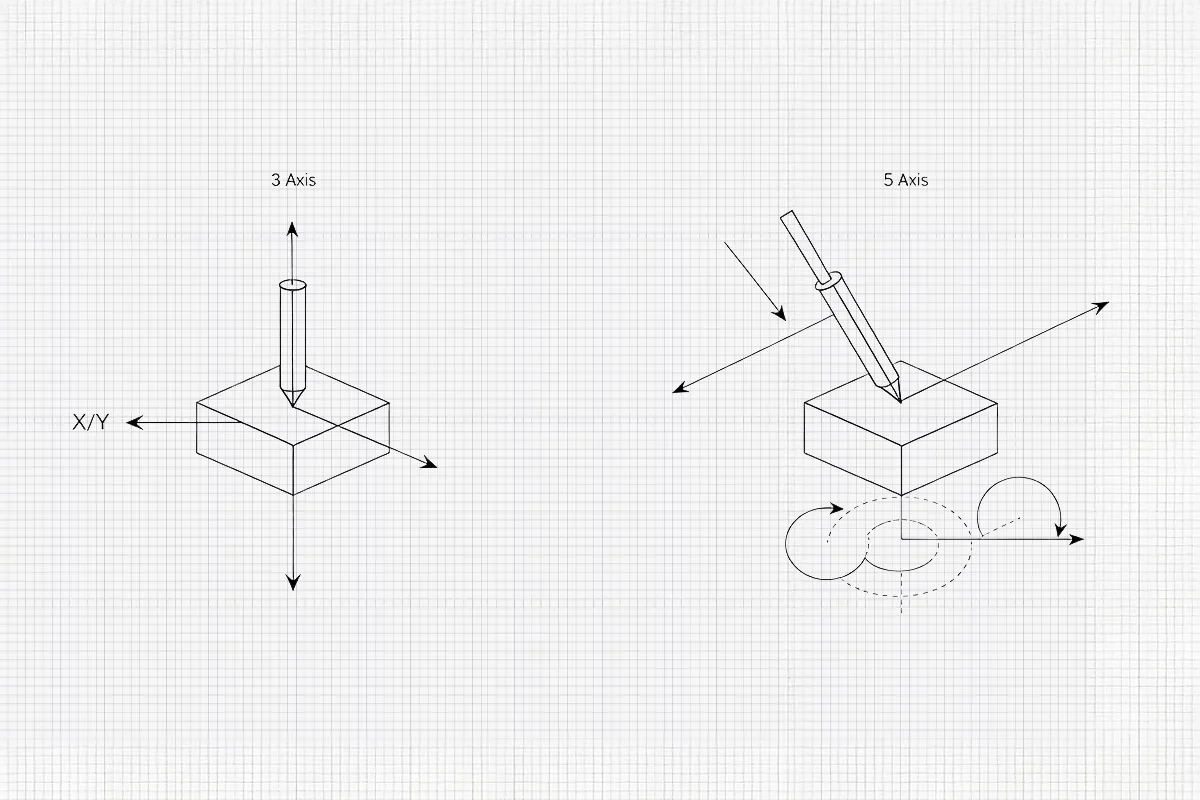
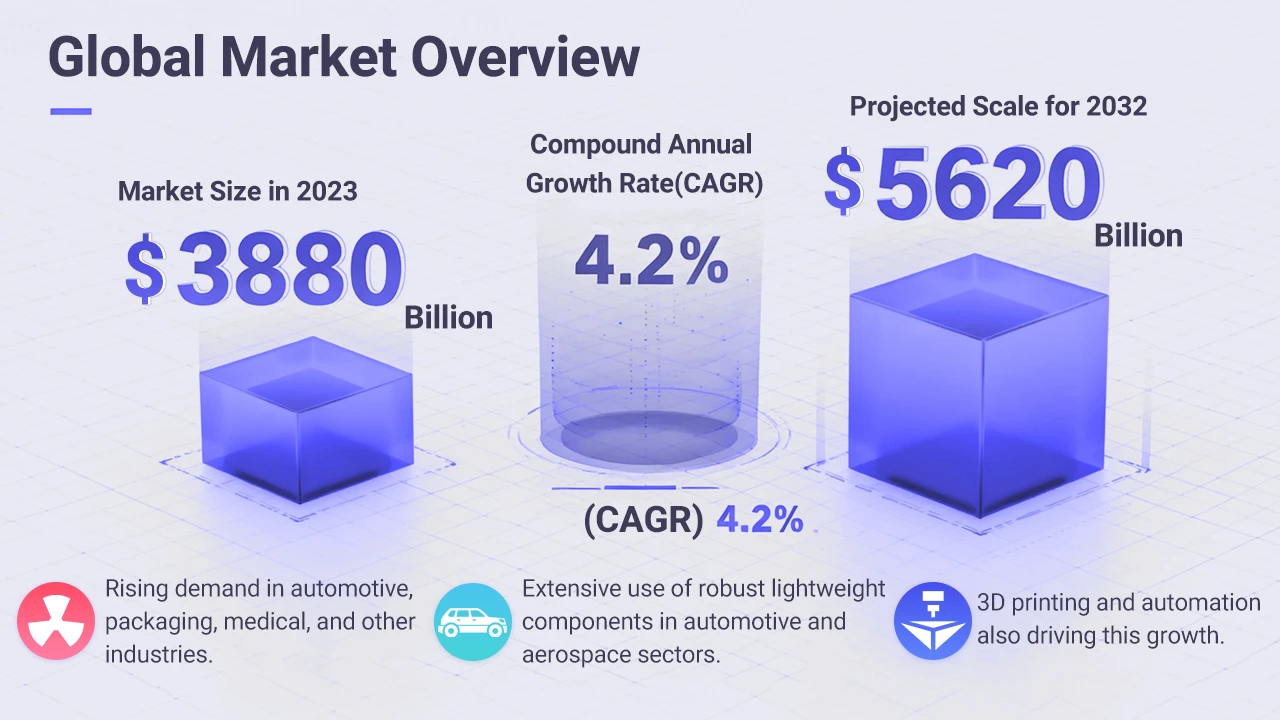
In 2023, the estimated global market size was $388 billion. With a compound annual growth rate (CAGR) of 4.2% between 2024 and 2032, this figure is projected to rise to nearly $562 billion by 2032. This growth is due to rising demand for plastic in industries such as automotive, packaging, and medical. This demand is due to the vast usage of strong and lightweight components in the automotive and aerospace sectors. Adoption of digital manufacturing, such as 3D printing and automation, has also contributed to this growth.
Regional Analysis
The market growth is uneven, with some regions dominating over others.
- Asia Pacific led the market with a share of 49.25% in 2023. China, India, and Japan top the region due to rapid urbanization and the Automotive industries.
- The US market is expected to reach $65.32 billion by 2032, driven by the electrical & electronic and medical industries. This growth is driven by advanced materials, automated molding, and adherence to strict quality standards.
- European regions have a significant share, with Germany, Italy, and France leading. These regions benefit from complex automotive and packaging sectors.
- UAE, Saudi Arabia & South Africa (Middle East & Africa) are rising due to consumer demands for cost-effective plastic commodities. This market potential is due to the support of the construction and consumer products industries.
Future Outlook
The future of injection molding hinges on technological advancements.
- Automation and Industrials 4.0: Smart technology, robotics, and automation are increasingly leading the way. It aims to improve production through lowering labor costs, increasing efficiency, and maintaining consistency. The emerging technologies, such as IoT and time quality controls, are being integrated with injection molding technology.
- Advanced materials: Improvement of raw materials like polymers to composites and higher-performance resins is opening new opportunities. These materials aim to replace traditional materials like metal in many applications.
- Circular Economy: As the world moves towards more sustainable and eco-friendly practices, there’s a need to balance between consumer demands and strict regulations. There is an adoption of bioplastics and biodegradable plastics to reduce plastic pollution and health risks.
Frequently Asked Questions (FAQs)
It’s a manufacturing process where molten material, like plastic, is forced into a mold cavity to create high volumes of identical parts. The material is melted in a heated barrel, injected into the mold, and then cools and solidifies into the final shape.
While thermoplastics (like ABS and Nylon) are most common, the process also works with thermosets, liquid silicone rubber (LSR), and even metals (through a special process called MIM).
Its biggest strengths are incredible efficiency for mass production, the ability to make highly complex and detailed parts, and great design flexibility once the initial mold is built.
The mold itself is a significant upfront investment. Costs can range from a few thousand dollars for a simple aluminum mold to tens of thousands (or more) for a complex, multi-cavity steel mold designed for millions of cycles.
The per-part price is influenced by six key things: the initial mold cost, the raw material used, the cycle time of the machine, any required secondary operations (like painting), packaging, and the molder’s overhead.
Think of it like pouring vs. pressing. Injection molding forces liquid material into a closed mold, perfect for complex shapes. Compression molding places a material charge into an open mold, which then closes and squeezes (compresses) it into shape, which is often better for larger, simpler parts like some rubber items.
Choose plastic when your priorities are light weight, lower per-part cost for high volumes, corrosion resistance, electrical insulation, and the ability to create complex geometries that would be expensive to machine from metal.
Uniform walls are vital because they allow the plastic to cool evenly, preventing visual defects like sink marks and internal warping. Draft angles (a slight taper on vertical walls) are a simple trick that allows the part to be ejected from the mold cleanly without getting scratched or stuck.
References
[1] Rosato, Dominick V., and Marlene G. Rosato. Injection molding handbook. Springer Science & Business Media, 2012. William G. Frizelle,10 – Injection Molding Technology,Editor(s): Myer Kutz,In Plastics Design Library,Applied Plastics Engineering Handbook (Second Edition)
[2] Frizelle, W. G. (2017). Injection molding technology. In M. Kutz (Ed.), Applied Plastics Engineering Handbook (2nd ed., pp. 191–202). William Andrew. https://doi.org/10.1016/B978-0-323-39040-8.00010-9
[3] Zhao, L., Rong, L., Zhao, L., Yang, J., Wang, L., & Sun, H. (2020). Plastics of the future? The impact of biodegradable polymers on the environment. In Microplastics in Terrestrial Environment. Springer Nature. https://doi.org/10.1007/698_2020_462
[4] Fu, H., et al. (2020). Overview of injection molding technology for processing polymers and their composites. ES Materials & Manufacturing, 8(20), 3–23.
[5] Jong, W. R., & Lai, P. J. (2011). Realization of DFM in mold design & manufacturing. Advanced Materials Research, 314, 2293–2300.
[6] Tosello, G., et al. (2019). Value chain and production cost optimization by integrating additive manufacturing in injection molding process chain. The International Journal of Advanced Manufacturing Technology, 100(1), 783–795.
[7] Aminabadi, S. S., et al. (2022). Industry 4.0 in-line AI quality control of plastic injection molded parts. Polymers, 14(17), Article 3551.
[8] Fortune Business Insights. (n.d.). Injection molded plastics market size, share & industry analysis. Retrieved from https://www.fortunebusinessinsights.com/injection-molded-plastics-market-101970
[9] Zion Market Research. (n.d.). Injection Molding Market by Material (Plastics and Metals). Retrieved from https://www.zionmarketresearch.com/report/injection-molding-market